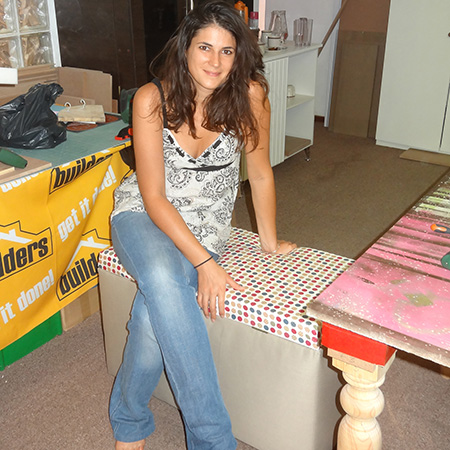
DIY DIVAS Make an Upholstered Storage Bench
While similar in design to our Upholstered Storage Ottoman, this weekend the DIY Divas made an Upholstered Storage Bench that is ideal for at the bottom of a bed.

To make this upholstered storage bench...
YOU WILL NEED:
2 of 400 x 800mm 16mm particle board - front and back
2 of 400 x 800mm 16mm particle board - top and bottom
2 of 368 x 400mm 16mm particle board - sides
2 butt hinges or 1 piano hinge and 16mm screws
4 x 40mm cut screws
4 x 25mm cut screws
4 feet and screws*
1 of 600 x 2500mm fabric for base
1 of 600 x 1200mm fabric for top
1 of 400 x 2500mm lightweight batting
1 of 50mm thick 400 x 800mm medium density foam block
TOOLS:
Drill/Driver plus assorted bits
Countersink bit
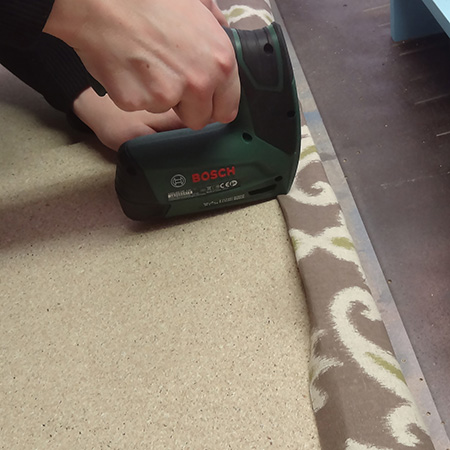
Bosch Tacker and staples
Tork Craft corner brackets
Tape measure and pencil
Scissors
*If using plastic feet as shown here, use 5 x 55mm screws to attach
HERE'S HOW:
1. Use corner clamps to hold one of the sides against the front while you drill two 3mm holes through the front and into the side. Countersink the holes. Drive in 40mm screws. Repeat this to attach the other side to the front.
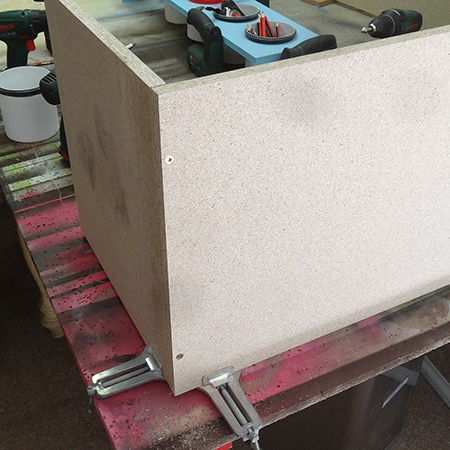
2. Place the front on the table to make it easier to attach the back to the sides in the same way as the front.

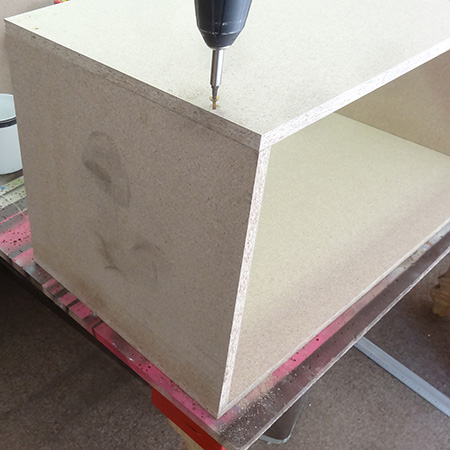
3. Now you can attach the base. Drill two pilot holes through the base into the sides and three pilot holes through the base into the front and back. Countersink all holes and drive in 40mm screws.
4. Staple one end of the batting staple this to the base frame. Wrap the batting around the base and add a few staples to secure the end of the batting at the starting point. Trim away any excess.
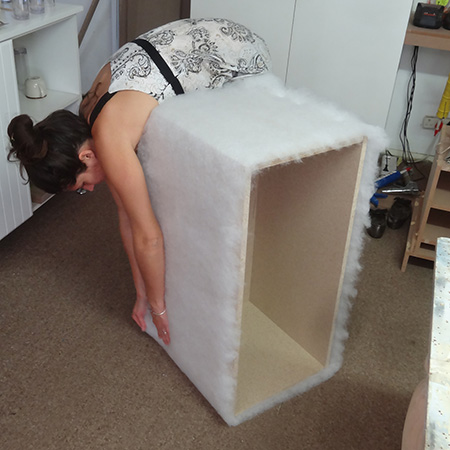
5. Tease the top and bottom edges of the batting to soften the edge and give a more professional finish once the base is wrapped with fabric.
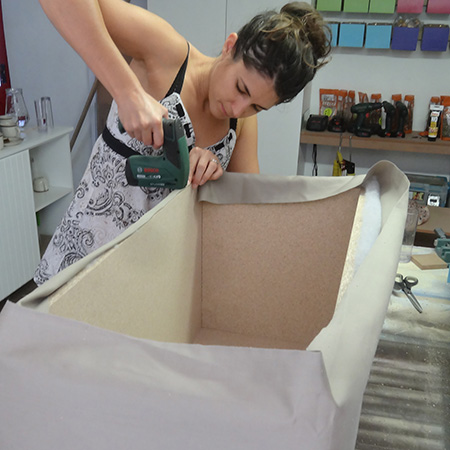
6. Place the fabric on the base to allow plenty of fabric at the top and bottom for folding over.
7. Fold under one end of the fabric and secure at the same point as the batting, using 5 or 6 staples to secure to the frame. Make sure the fabric is reasonably tight as you wrap around the base frame, fold under and secure on top of the starting point.
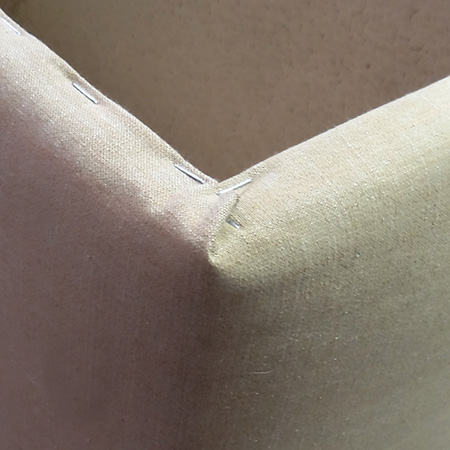
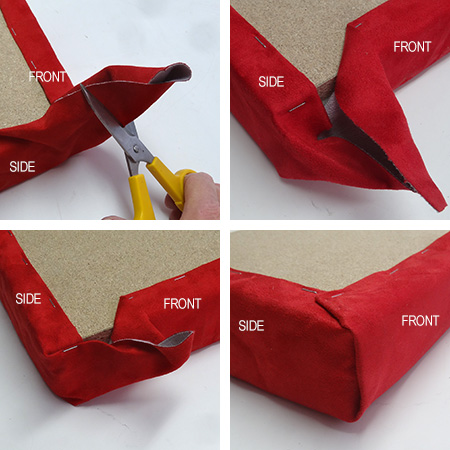
8. Neatly fold under and staple the fabric to the base, leaving the corners until last. Play with the corners to get a nice neat fold before stapling in place.
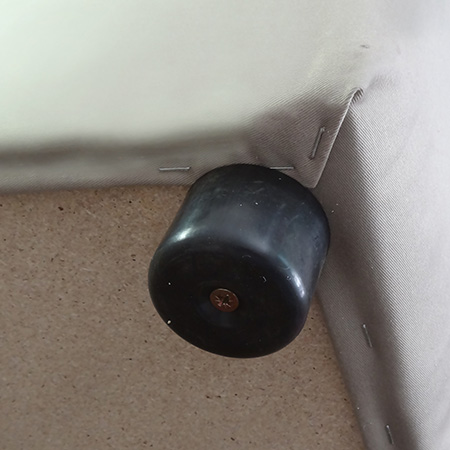
9. Secure the feet onto the base with 55mm screws. Don't overtighten the screws as this will strip the hole and you will need to move to another spot to fasten each foot in place.
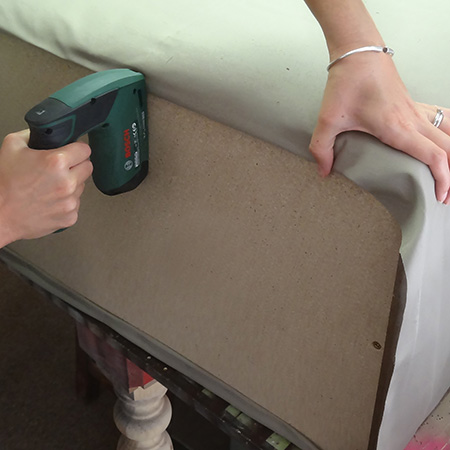
10. Fold under and secure the fabric to the top of the frame. Once again, leave the corners until last so that you can cut away any excess fabric in order to fold neatly and staple in place.
11. To upholster the lid, place the fabric face down and place the foam and particle board lid on top of this. Lift and fold the fabric up and over to secure to the underside of the top with staples. Leave the corners until last.
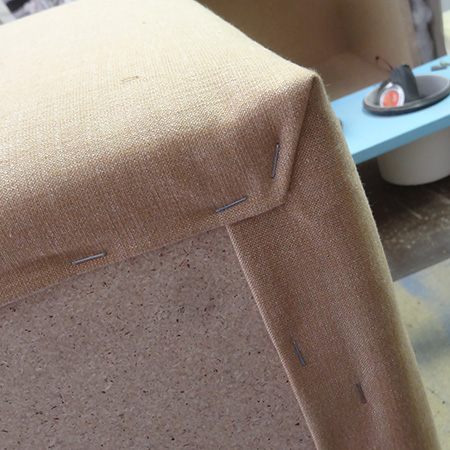
12. For the corners follow the step-by-step images below for perfectly straight corners.
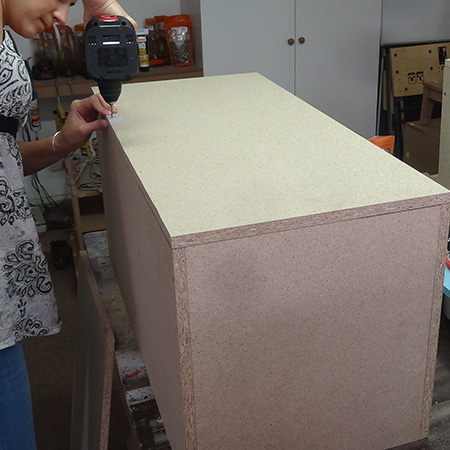
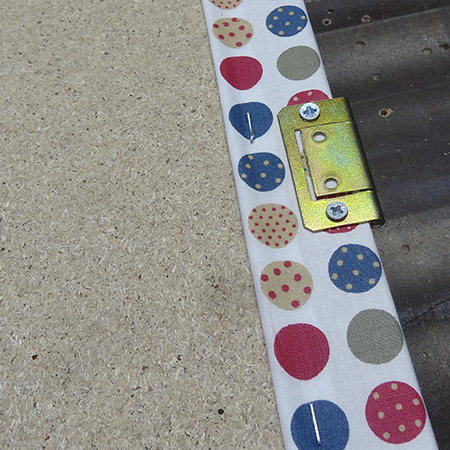
13. Use a 2mm HSS bit to make a hole where the hinges will be fastened to the underside of the lid. This will prevent the fabric from getting caught on the screw. Use 16mm screws to attach the hinges to the lid.
GOOD TO KNOW
Make sure the barrel (centre pin) of the hinge hangs over the edge of the board.
14. Hold the lid against the base to mark and drill holes for mounting the hinges on the edge of the base frame. Secure the hinge to the base with 25mm screws.
Finishing
If you wish you can use a needle and thread to close up the side slits on the lid.